Showing posts with label handmade. Show all posts

9.12.2010

Playing in my art journal again

And it feels wonderful
Playing with my watercolors. 
I have been inspired (again) by Geninne's amazing watercolors.
There is so much to learn.
How does she make the colors swirl so gorgeously?
I also joined in on Michelle Ward's 44th Crusade.
I have painted by scraping with a card or palette knife
many times, but it was the perfect prompt
to get me back in my art journal.
What I started with:
pre-painted page and my scraping devices.
Many layers later, I ended up with this:
I scraped on paint,
sprayed water and dabbed off.
Scraped on more paint, dabbed water...
repeat.
At the end I added in some birdie masks
with some spray ink.
Now this page is just waiting for some journaling!

Next up was an art project with the kids I babysit for.
I love these kids, so last night I made them little
books out of recycled cereal boxes and extra moleskine paper
from my Sketchbook Project rebinding.
I decided it would be fun to have them design their own stamps,
and I would cut them out. 
Max, who's 6, wrote out the "I love you Mama and Mommi"
How cute is that?!
It is such an EASY thing to do if you have kids.
I also think how it is a permanent reminder
of them stuck in time.
All I did was have them draw in pencil 
whatever they wanted on tracing paper.
We then flipped over the paper onto the rubber,
gently rubbed the back of the paper to transfer the graphite,
and then drew over the design in Sharpie.
I cut out the stamps while they painted their book covers.
I love it. 

8.15.2010

Making your own stencils

I haven't made a stencil of my own in quite some time.
Its a super easy way to add your own design
and style into your art journaling.
All you need is some thin plastic,
(Walmart and Michael's also sell stencil blanks)
a piece of glass, an exacto knife (I use a stencil cutting tool)
some tracing paper and a black marker.
I decided to go for a diamond pattern,
and traced one from a piece of scrapbook paper I had left over.
Tip: Use a ruler for geometric objects!
After going through a couple of rows 
and realizing that my lines were uneven,
I busted out a ruler and it made it MUCH easier.
Once you've transferred the pattern onto tracing paper,
color it in/outline it with black marker.
This step is VERY important, because
otherwise you will be squinting to see the design through
the piece of glass and the plastic.
Once I colored in my pattern, it was time to cut!
Tip: Always leave space between the designs
I've made the mistake a few times 
when cutting stencils of just going to town
cutting out the outline, and forgetting that
when you make a stencil you need a little bit of plastic
to stay in between the different shapes, otherwise
it will all come out and you will be left with a big hole!
Next you put the piece of glass over the tracing paper
and the stencil film on top and cut away!
I made lots of mistakes, and my pattern
isn't perfect. This probably would have been
a better task for just a ruler and an exacto knife.
This is drafting film and really thin.
Oh well, live and learn :)
And because its on my desk, a journal page from 
The Big Journal in progress

7.25.2010

How I made my travel journal!

Inspired by Hanna's sweet Egypt travel journal
and Lori's amazing Coptic-Bound journals,
I decided since I am actually taking a V-A-C-A-T-I-O-N
this year, I'd make myself a journal!
Just a warning now: This will be a long post!
I haven't been on a real vacation in a very long time.
Not since 2007.
My dad's side of the family goes to the Adirondacks every year,
and I haven't been since 1999...right before I left for college.
Life got in the way. School. Graduation. The Real World.
Isolation. Depression...you know :)
ANYWAY, my family all made an (unspoken) decision
this year to go. My Uncle was sick,
and we knew it would probably be the last time we'd
get to all be together as a family.
Sadly, he didn't make it.
This is the last time I saw him,
right before they told us about his cancer diagnosis,
back in October.
He made it 7 months.
Cancer is a cruel, cruel thing.
I love this picture of my aunt and uncle.

Ok. Enough sadness.
We all decided we would still be going this year,
and inspired by Hanna's awesome travel journal
and Lori's awesome coptic journal-making style,
I thought I'd make one of my own.
A combination of this website, and a YouTube video,
I sort of made a coptic bound journal.
By sort of, I mean not really.
It doesn't really look like it is supposed to
and there are TONS of mistakes.
It is my first one, so oh well.
 I already had all the supplies I needed
from Julie Prichard's class:
An awl, or hole punching device
A bone folder (or any straight edge)
exacto/box cutting knife
Paper
Thread (I have waxed thread from papersource.com)
Needle (18 gauge)
Glue (I use PVA glue, but really Elmers would work)
Book Board or Cardboard for the covers

First thing I did was figure out what size
I wanted my journal to be.

 I knew I wanted it smaller,
so I just cut my paper into what size looked good to me.
I cut 16 pieces of paper,
scrapbook, watercolor, hand-painted, graph...
at 7x10.5 inches.
Folded in half is 7x5.25.
Perfect!
Next step is the above picture.
Fold the papers in half.
Put together your "signatures,"
aka: pieces of paper stacked inside each other.
I did 4 signatures, with 4 pieces of paper in each one

 Next, cut the book board (or cardboard) to size,
just slightly larger (about 1/4 inch around)
than your papers.
Above picture is my signatures and book board
(with holes punched)

.I then covered the book board
with masa paper,
or any thin and durable paper.
I made the paper about 1/2 extra on each side.
Glue paper on.
Fold the sides in pretty, like wrapping a gift.
Decorate your paper if you'd like.

Next, you need to punch the holes
in each signature, and the cover.
They MUST be evenly spaced
for the thread not to get all crazy and screwy on you.
The easiest way is to make a template
to punch the holes in.
This is where awl comes in handy.
 Maybe you can follow the instructions
from the website and the YouTube better than I.
While my finished product is one I enjoy,
its so not as good as it can/should be.
Though, the book does lay flat,
which is really why I wanted to try this method.
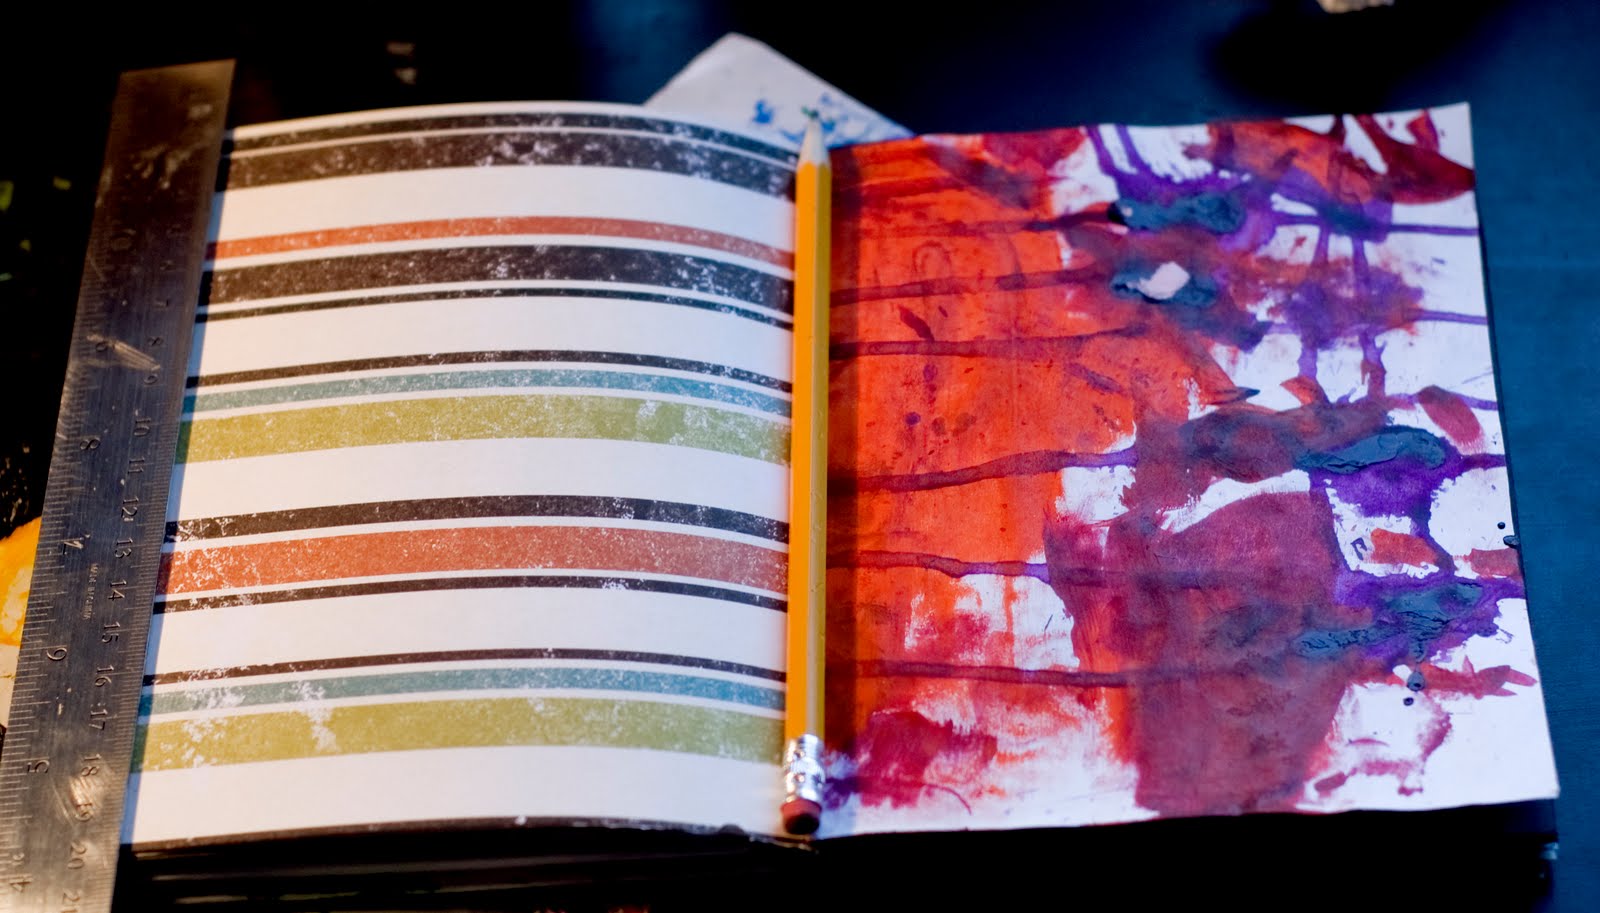
 You can see all the different
pages are all meshed in here.
I lOVE it.
Each page is a little different,
and hopefully will tell me
how I should journal my trip.
This is what the inside of the covers look like.
I made a little mosaic of all my papers,
and painted a glaze over top to
try and unify it.
Also, a (non) helpful, but not necessary step
is if your pet tries to join in the fun.
Jack tried really hard to help me
get the supplies I needed.
Unfortunately, with the lack of opposable thumbs,
he just couldn't make do.
So he decided to dig out my bubble wrap
and fall asleep.
Its hard being a cat in this house.

4.08.2010

Want to make cheap painted paper?


A roll of paper towels could probably last you a VERY long time.
Each piece of paper towel lends you to two pieces of your
own original painted paper.
Plus, its fun! And easy! And cheap!
All you need to do is gather up your spray inks
(I use Adirondack inks)
or acrylic paints, and a bunch of paper towels.
With watered down inks or paints
just scrunch/fold your towels and dip.
Similar to those tye-dyed shirts when you were a kid.
Lay them flat to dry.
Once dry, iron each piece out and the paper towels will separate,
and you will get two sheer, translucent paper...all of your own
original doing! You can create layers of towels to create
depth and awesomeness to your paintings. 
 Once you iron the paper towels, 
they get a different, more stable consistency,
ready to play :)

3.22.2010

Front Cover Done of Music Book

Remember me working hard on my music book ?
I finally sat down tonight and painted the front cover.
What do you think?
   

3.14.2010

Painted Paper A-Thon

Today, I got out all my blank paper that has just been
waiting oh so patiently to be painted upon.
I got out all my paints,
all my tools, and went to town.


Oh yeah, I have finished making my Music Book
The pages are crooked, uneven, lopsided.
Even so, I am proud that I made this from recylables!


3.09.2010

From Recyclables to Book

I broke down some boxes of mine....mmmmm....beer and thin mints.
And spent the past few days cutting, and sanding
my pages down to size.

Next I will be gessoing the pages to get ready for the abuse
they will receive. 

I plan on making this my Music Book. 
Clever title, right?
I think I want to do it mostly black and white,
with splashes of color here and there.
I L-O-V-E color, but this will be a little different,
pushing my boundaries a little. 
I want to make pages inspired by my favorite lyrics,
the way a song makes me feel.

I'm excited!

1.31.2010

A letter to Hugo

I decided to write a letter to my kitten, Hugo, who died 2 years ago. 
I haven't really been able to look at pictures of him because it makes
me too sad. Last night I felt ready to dedicate a page to him, and to
print out a couple of my favorite pictures. It was cathartic.
And creative :)


11.22.2009

Making another journal

I finally got around to making a journal that I learned in Julie Prichard's SuperNova class. I wanted to wait until I had enough art journal entries to make a book.

After many tries, I finished it! I am SO not a sewer...and this stitch took me a few tries to figure it out. It was more unwieldy than anything else. I also made some too loose, other too tight...but it works.

The cover was inspired by a picture of Munich in the winter. Gorgeous teals and crimson reds covered in a soft layer of snow. Beautiful.


The stitching on the outside. Messy, but thats ok, it was my first try.


And some inside peeks of the pages...most of which have been posted here anyway.


Hope everyone had a great weekend creating.

10.26.2009

Homemade Photo Album

I went to NY this weekend for my cousin's wedding and had a blast. By the time I looked at her registry, most everything was bought, and I didn't just want to give her cash. A few days before I found this website and this tutorial. I thought it was so creative and unique that I decided to try and make a photo album for my cousin. Combining Julie Prichard's Super Nova class techniques and this tutorial, this is what I came up with. The cover is painted in the colors of the wedding, and the quote is from their wedding song. I also hand-carved the "Love" stamp. I thought it turned out pretty well for it being my first try and carving letters.

Final verdict? She LOVED it! :)


Close up of the inside cover. Sorry about the color shift, I have no idea why it shows so damned pink.