7.27.2010

30 Journals 30 Days

 
Connie from Dirty Footprints Studio
has been doing "30 Journals for 30 Days"
during the month of July.
She chose various art journals from all skill levels
and asked them all the same questions.
It was WONDERFUL to get more in-depth with
some of my favorite journalers
and find new favorites.
I was sad that the end of July was coming,
thus the end of 30 Journals 30 days.
Lo and Behold, Connie extended her love
for everyone!
She is allowing us to answer her questions ourselves,
and on Saturday she will add them to her Link on her website.
How generous and thoughtful.
Though, in deciding to participate in this
I realized I have to actually dig deep to answer these questions.
I generally not a fan of that,
but that is the path I am on.
I want to figure myself out.
I want to live authentically.
I want to believe in myself.
I think I am on the right path with my newfound
love of art journaling.
Without further ado,
here is my interview with myself.

  • How long have you been Art Journaling? 
  • I started about a year ago (almost exactly!). I ran into Julie Prichard's blog somehow, and my life changed. 
  • How has Art Journaling impacted, changed, or enhanced your life?
  •  I want to say it has changed me deeply, or profoundly. It seems to for so many other people. For me, it has given me something to be excited about again. I had been depressed for many, many years, but just didn't realize it. I just thought it was who I was. I haven't felt true joy/happiness for years, but I also haven't felt the soul-sucking despair that I have felt in the past. I guess I lived numb. It is something I am still working on, but for the first time in close to 6 years, I am truly looking forward to something. Truly excited. It feels weird. 
  • I'm rambling. What this is leading to, is how art journaling has helped bring me out of that. I found something that keeps me excited, itching to come home and learn. Play. Despite many times I don't like what comes out, I keep forging ahead. A year later, and I still want to do this. I don't know if it will go anywhere, but I do believe it is better for my mental health
  •  
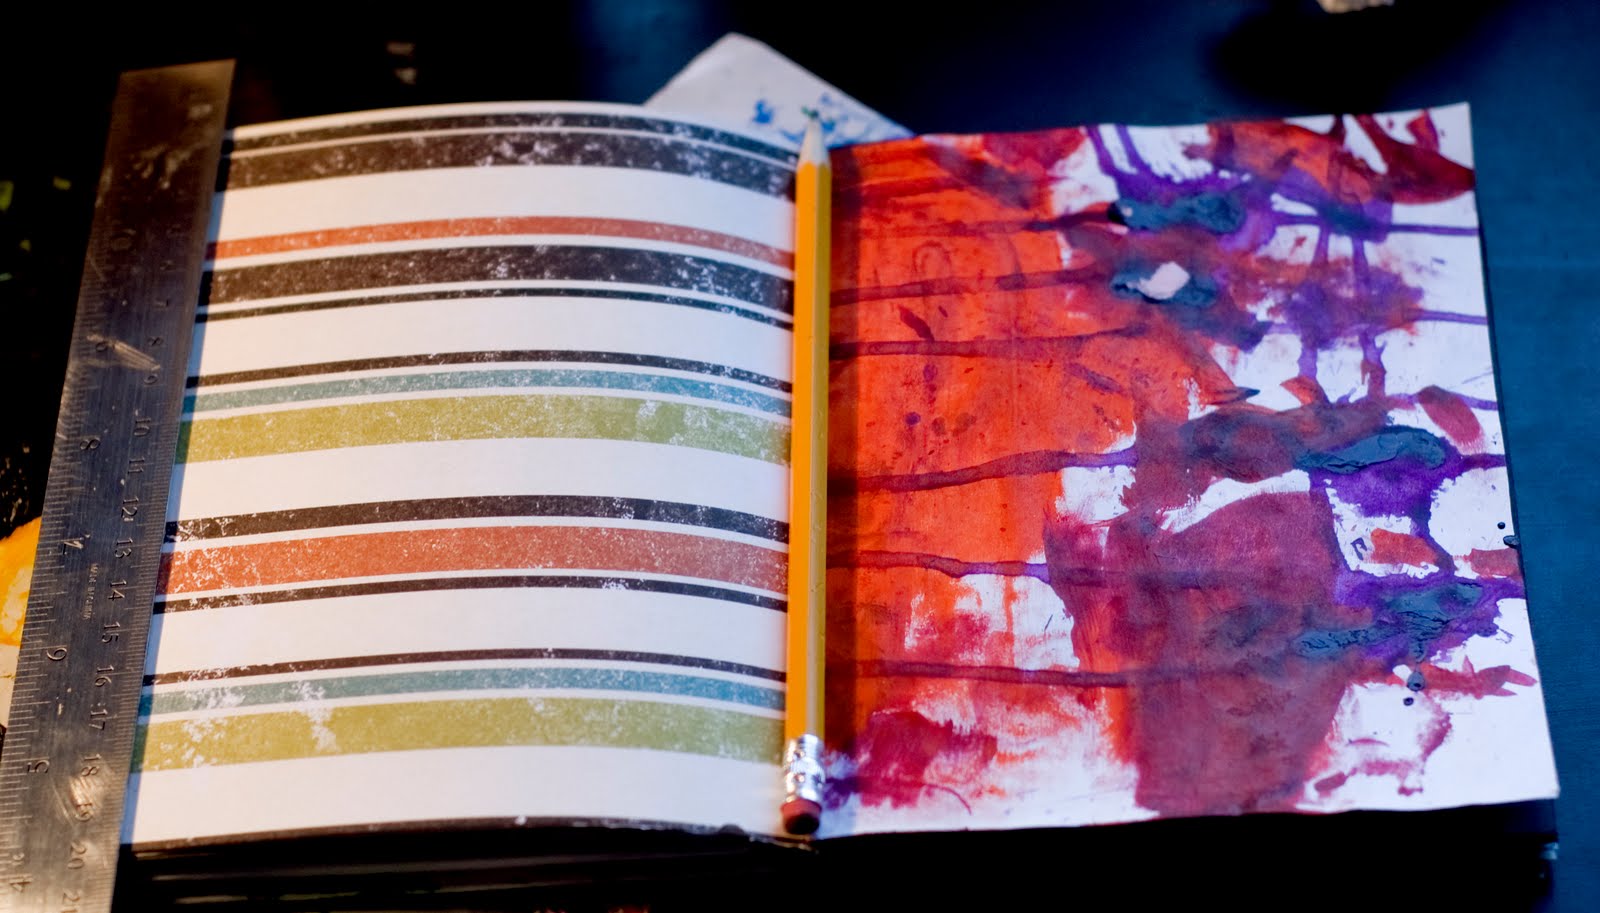
  • What are a few of your favorite Art Journaling materials?
  • I guess it depends on what I am currently into. For drawing purposes, I LOVE Micron pens. They are permanent, have all different sizes and are just lovely to work with. Paints. Julie Prichard introduced me to Golden Fluid Acrylics and I never looked back. They are bright and vivid. A little does go a long way. 
  • Who are some of your favorite Art Journalers?
  •  Ok. I have TOO MANY to put in here. Really, just look at my blogroll...There are so many people than inspire me; from illustrators to designers to painters to other newbie art journalers...
  • What kind words of encouragement would you say to an Art Journal newbie?
  • If you have any inkling to put paint to the paper, doodle, draw, sew...don't let that stupid inner critic in. I know. I spent all my life being jealous of my little brother because he holds all the talent in the family. He can draw amazing things. He can paint. He is the creative one. I can barely draw a stick figure! Starting an art journal was a painless transition into creativity. If I tried and messed up, no one needed to see. Turns out that my love of color (Favorite color? ROY G BIV!) is so much fun translating into smearing paint around a page. If any interest is sparked, DO IT! 
  • Where can we contact you...give us some link LOVE!!
  • Well, since you are at my blog...I don't need to give you that ;) I do have a Flickr account though! 
  • Short Bio.
My name is Dawn, and I hail from Upstate NY and have been living in Charlottesville, VA for the past 5.5 years. I have a cat named Jack, and just am trying to figure myself and life out.


Art Journal page inspired by a 6 year old

Baby sitting this past weekend,
we decided to paint some wooden boxes.
I sat back and watched in delight
as he poured paint on,
spreading around whatever colors
he liked.
Ignoring color theory,
or any sort of "rules"
he just enjoyed putting paint down.
So refreshing.
A wonderful reminder to
paint with abandon.
I am leaving for my vacation up to the Adirondacks 
on Friday!!!!
(!!!!!!!)
I can NOT wait to relax.
Canoe, go on boat rides, lay on the beach,
go on hikes, read, paint, journal.
Take lots of pictures.
Sounds like heaven, doesn't it?
I hope so!
I hope I come back with lots of inspiration.
Check back at the end of next week for an update!

7.25.2010

How I made my travel journal!

Inspired by Hanna's sweet Egypt travel journal
and Lori's amazing Coptic-Bound journals,
I decided since I am actually taking a V-A-C-A-T-I-O-N
this year, I'd make myself a journal!
Just a warning now: This will be a long post!
I haven't been on a real vacation in a very long time.
Not since 2007.
My dad's side of the family goes to the Adirondacks every year,
and I haven't been since 1999...right before I left for college.
Life got in the way. School. Graduation. The Real World.
Isolation. Depression...you know :)
ANYWAY, my family all made an (unspoken) decision
this year to go. My Uncle was sick,
and we knew it would probably be the last time we'd
get to all be together as a family.
Sadly, he didn't make it.
This is the last time I saw him,
right before they told us about his cancer diagnosis,
back in October.
He made it 7 months.
Cancer is a cruel, cruel thing.
I love this picture of my aunt and uncle.

Ok. Enough sadness.
We all decided we would still be going this year,
and inspired by Hanna's awesome travel journal
and Lori's awesome coptic journal-making style,
I thought I'd make one of my own.
A combination of this website, and a YouTube video,
I sort of made a coptic bound journal.
By sort of, I mean not really.
It doesn't really look like it is supposed to
and there are TONS of mistakes.
It is my first one, so oh well.
 I already had all the supplies I needed
from Julie Prichard's class:
An awl, or hole punching device
A bone folder (or any straight edge)
exacto/box cutting knife
Paper
Thread (I have waxed thread from papersource.com)
Needle (18 gauge)
Glue (I use PVA glue, but really Elmers would work)
Book Board or Cardboard for the covers

First thing I did was figure out what size
I wanted my journal to be.

 I knew I wanted it smaller,
so I just cut my paper into what size looked good to me.
I cut 16 pieces of paper,
scrapbook, watercolor, hand-painted, graph...
at 7x10.5 inches.
Folded in half is 7x5.25.
Perfect!
Next step is the above picture.
Fold the papers in half.
Put together your "signatures,"
aka: pieces of paper stacked inside each other.
I did 4 signatures, with 4 pieces of paper in each one

 Next, cut the book board (or cardboard) to size,
just slightly larger (about 1/4 inch around)
than your papers.
Above picture is my signatures and book board
(with holes punched)

.I then covered the book board
with masa paper,
or any thin and durable paper.
I made the paper about 1/2 extra on each side.
Glue paper on.
Fold the sides in pretty, like wrapping a gift.
Decorate your paper if you'd like.

Next, you need to punch the holes
in each signature, and the cover.
They MUST be evenly spaced
for the thread not to get all crazy and screwy on you.
The easiest way is to make a template
to punch the holes in.
This is where awl comes in handy.
 Maybe you can follow the instructions
from the website and the YouTube better than I.
While my finished product is one I enjoy,
its so not as good as it can/should be.
Though, the book does lay flat,
which is really why I wanted to try this method.
 You can see all the different
pages are all meshed in here.
I lOVE it.
Each page is a little different,
and hopefully will tell me
how I should journal my trip.
This is what the inside of the covers look like.
I made a little mosaic of all my papers,
and painted a glaze over top to
try and unify it.
Also, a (non) helpful, but not necessary step
is if your pet tries to join in the fun.
Jack tried really hard to help me
get the supplies I needed.
Unfortunately, with the lack of opposable thumbs,
he just couldn't make do.
So he decided to dig out my bubble wrap
and fall asleep.
Its hard being a cat in this house.

7.21.2010

Drawing Practice

I have been one of those people
who SWEAR up and down they can't draw.
I still will tell you that.
I will tell you how awesome my brother is,
and I was the one shorted in the creativity department.
But, boosted in some self-confidence that I can
be creative, just in a different way,
I decided I wanted to learn how to draw.
It can only help, right?
Plus, I was inspired by Andrea's (AMAZING)
drawing skills, so I have been
drawing a little every day.
A few minutes here and there at work,
a little at home.
I've borrowed some books from the library.
I must say, I am pleased so far.
Not because anything is good
but because I am continuing to try.
Bear with me as I post some of my efforts!
My white balance is so off in all these photos!
It is all the same moleskine, I just suck
at making sure they all look the same ;)
This is to basically show you how
much I need to learn.
hahaha!
This is me trying to draw my feet 
(as I lay on the couch)
by drawing what I see.
There truly is a disconnect
between what you think you see,
and what there really is.
Plus, perspective and angles and curves
are all so HARD for me!
And shading.
Tonight, I tried to draw my eyes.
They look nothing like me,
but as eyes overall,
I don't think they are TOO bad.
The right eye looks surprised/scared
and the left eye looks sort of sad.
What do you think that says about
my mental health?
haha!

7.17.2010

Finally sat down and painted

Whew!
I was beginning to worry that i would never
feel like art journaling/painting again!
Even after I put in all that hard work
to re-do my room and dedicate
a bigger space and more organization
to my art area, I did nothing.
I sat and stared at its beauty
and organization for a full week.
Then my co-worker inspired me.
So I picked up the paint brush,
sat at my desk,
and got out the anxiety and worries
from the past few weeks that have been plaguing me.
I hope you enjoy!
What anxiety looks like to me.
Messy.
Lots of layers, and almost all fingerpainting here.
I thought I'd try it out, and it seemed fitting
for the feelings going into it.
Lots of layers and scratches.
The words are from a David Gray song:
"My oh my, it just don't stop.
My mind, I want to tear it up.
I try to fight it,
try to turn it off."

The calm after the storm. 
This has many layers of blue paints
mixed in there, painted with a palette knife
and a sponge brush.
I carved that little Buddha stamp,
cute isn't it?
Now only if my mind could focus
on the tranquility that envelopes me
when I am not plagued by worry.

PS: I used so many more of my supplies
when I had everything organized,
in its own space,
and easily accessible.
Before, it all was shoved on my desk
and mostly crammed in my bookshelf.
It was not conducive to art making.
When everything is messy and disorganized,
it takes a lot of effort to use it.
When we are in the midst of our flow,
we don't want to mess it up by having to root
through all our crap, do we?
I'm so glad I put in that work,
because so far it has paid off!

7.13.2010

Michelle Ward: Strip Ease

In the midst of my room redo,
I came up with a fun idea to try
out Michelle Ward's new Crusade.
Another simple, yet fun plan.
Tear your favorite papers,
and put them in a journal.
My little storage bins I bought looked like
it could use some decoration.
Starting out....it is cathartic to 
get my hands messy and gluey and 
just lay papers down.
All done!
Hope you enjoyed.

Finished new art room

Lots of pictures here.
It took me much longer to get my bedroom re-done.
Mainly because it took me two entire days
to put together wall shelves.

My rockin' music area,
and an un-cluttered shelf!

7.11.2010

Two Days: Two wall shelves built

Oh man.
It took an ENTIRE weekend,
two phone calls to dad,
another trip to Lowes
(that was unnecessary)
to put up two shelves
that should have taken
half an hour.
30 minutes.
Yep.
It took me longer to figure this s**t out
than to build a DESK!
After a hot bath,
and a glass of bourbon,
I can finally relax a little.
I have a sore neck and back,
but am SO glad its done.
Ignore those holes on the bottom of the top shelf.
I only tried to put it in 3 different times.
Turns out that I do NOT have drywall,
which is why no drywall anchor worked.
Apparently my wall is made of plaster?
My dad figured that out.
Over the phone.
Aren't dad's the best?
My little art corner is slowly shaping up.
My pretty little guy, Jack, loves this desk
so close to the windowsill.
Being a kitty is hard work.

Stay tuned for Strip Ease: Michelle Ward's Crusade

7.10.2010

Frustrated!

I'm still working on the re-doing of my room,
and today's main plan was to install
the two wall shelves I bought,
and then clean up and start organizing.
I started that at 2.
It is now 10pm, and I 
DID
NOT
FINISH
ONE
SHELF.
I don't understand!
First, I screwed
the screws in the wall.
Without the backplate that you put the shelf on.
Second, I have these plastic
drywall anchors, similar to these
that I am supposed to affix to the wall.
Ok.
After some time, I managed to screw the 
backplate to the wall with those damn things.
Except, it wasn't flush to the wall...
I had the long part against the wall (horizontally),
and thought maybe I put the screw
in backwards...maybe the horizontal side
goes against the back plate.
So I un-screwed the entire thing,
re-did it.
IT WAS EVEN WORSE.
Still shaky because its not
against the wall,
and because I can't put the damn
screws in straight.
Plus, both times
the shelf leaned forward,
so anything slides off.
I AM SO ANGRY!
I spent ALL day
trying to do ONE of two shelves.
I want them on my wall, dammit!
HELP?

7.08.2010

Phase 2 in Room/Studio Makeover

A post in pictures! 
I got sidetracked by another project tonight,
so it looks like Phase 3, the
Decorating and Organizing Phase
must wait until this weekend!
Enjoy :)
This is where my side project emerged.
I realized I needed a new chair, because the one I had
was too short.
I thought a stool would be perfect.